Sculpting Method Quiz
Test Your Sculpting Knowledge
Take this 5-question quiz to see which sculpting method is best for you and test your understanding of the four basic techniques.
When you think of sculpture, you might picture a marble statue or a bronze figure in a park. But behind every piece is a process - and there are only four basic ways artists shape material into form. These methods haven’t changed much in thousands of years, but the materials and tools have. Whether you're holding a lump of clay for the first time or chiseling your first block of limestone, knowing these four methods gives you the foundation to understand how sculpture works - and how to start making it yourself.
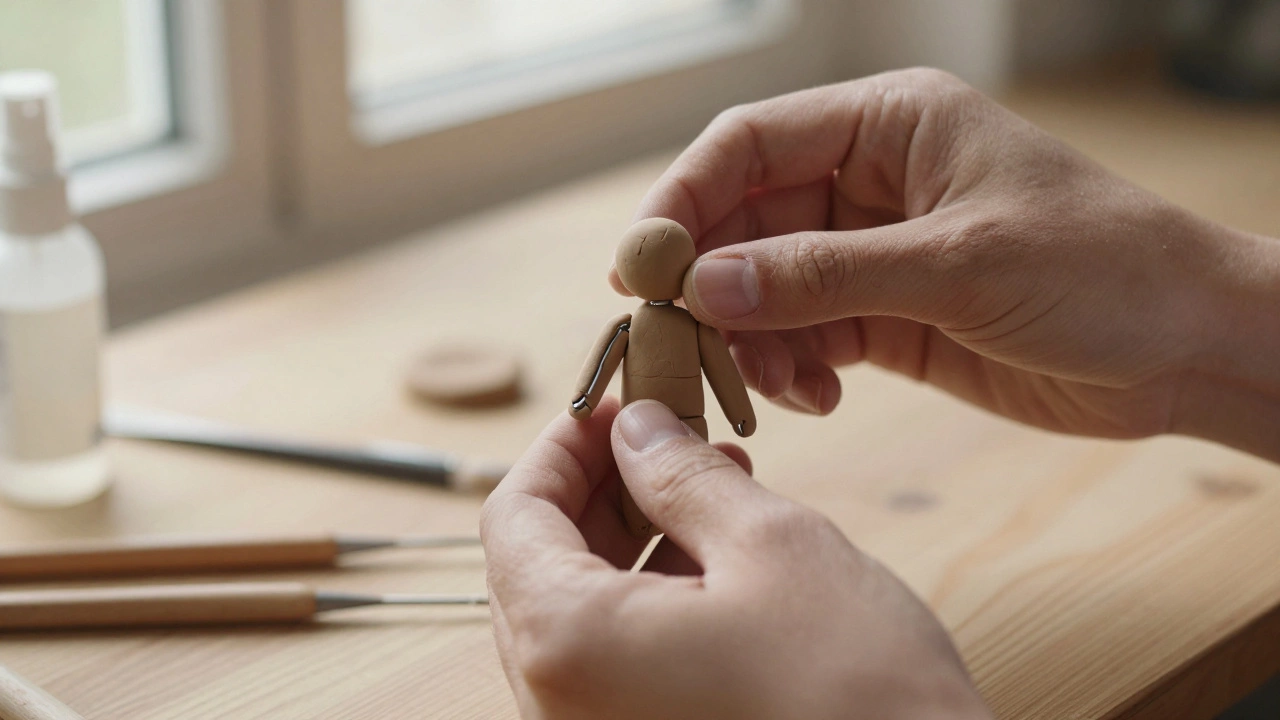
Additive Sculpting: Building Up
Additive sculpting is exactly what it sounds like: you build the form by adding material. This is the most forgiving method for beginners because you can always add more, reshape, or smooth things out. Think of it like baking a cake - you layer ingredients until you get the shape you want.
Clay is the most common material for additive sculpting. Potters, animators, and fine artists all use it. Air-dry clay, polymer clay, and ceramic clay each behave differently. Polymer clay, for example, hardens in a home oven and doesn’t crack like traditional ceramic clay, which needs a kiln. Many artists start with armatures - wire skeletons - to support larger forms. Without them, a clay figure’s arms or neck would collapse under its own weight.
Wax is another additive medium, especially popular in lost-wax bronze casting. Artists build intricate shapes in wax, then encase them in plaster. When heated, the wax melts away, leaving a hollow mold for molten bronze. This method lets artists capture tiny details - fingerprints, fabric folds, even eyelashes - that would be impossible to carve.
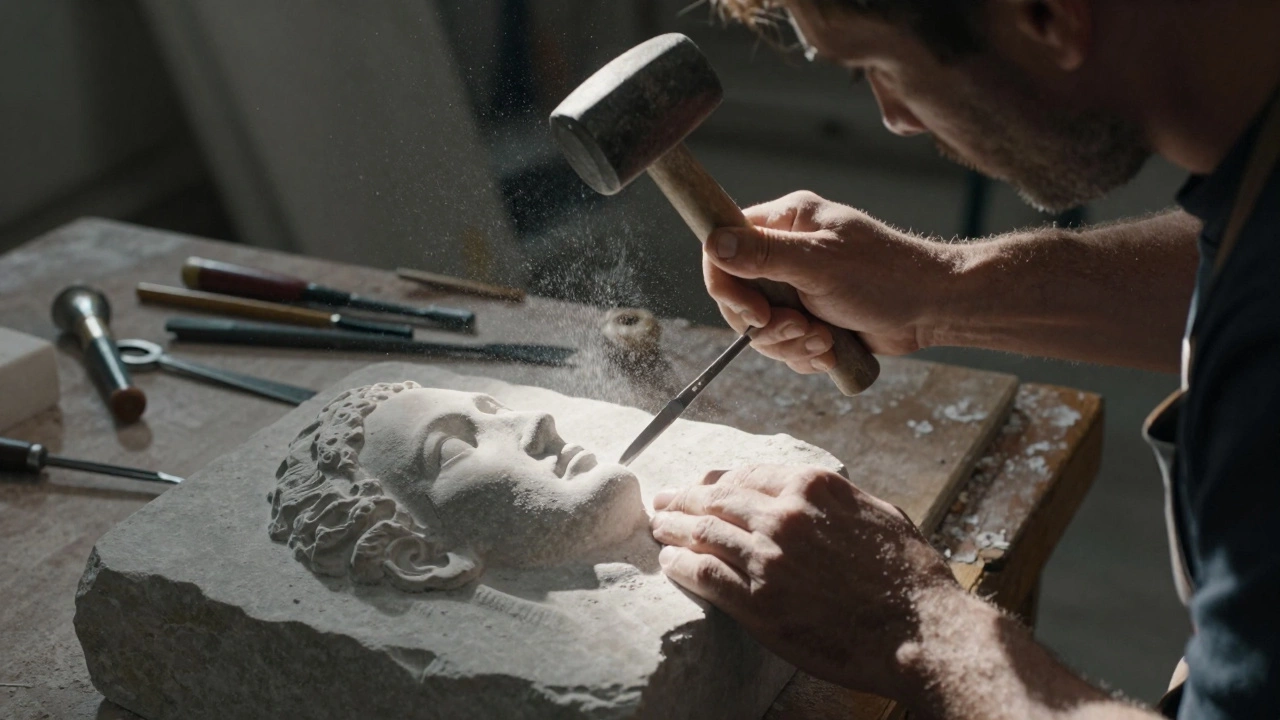
Subtractive Sculpting: Carving Away
Subtractive sculpting is the opposite: you start with a solid block and remove material until the form appears. It’s like finding the sculpture hidden inside the stone. This method demands patience and precision. One wrong cut can ruin hours of work.
Stone carving is the classic example. Marble, limestone, alabaster, and granite have been used since ancient Egypt and Greece. Michelangelo famously said he saw the figure already inside the marble - his job was just to free it. Tools like point chisels, tooth chisels, and rasps are used in sequence, from rough shaping to fine finishing. Each tool leaves a different texture. A point chisel makes deep grooves; a rasp smooths like sandpaper.
Wood carving is another subtractive method. Hardwoods like oak and walnut hold detail well but are tough to work. Softwoods like basswood or butternut are easier for beginners. Carvers use gouges - curved chisels - to hollow out shapes. Unlike stone, wood has grain. You have to carve with the grain, not against it, or the wood will splinter.
One thing all subtractive sculptors learn early: you can’t undo a cut. That’s why they sketch, measure, and often make small models first. Many sculptors use calipers to check proportions as they go, making sure the nose is where it should be relative to the chin.
Modeling: Shaping Soft Materials
Modeling is often confused with additive sculpting, but it’s its own category. It’s about shaping soft, pliable materials with hands and simple tools. The key difference? Modeling doesn’t always involve building up from nothing - it’s about manipulating what’s already there.
Clay is still the star here, but so are wax, plaster, and even bread dough in experimental art. The tools are basic: wooden ribs, metal loops, sponges, and even your fingers. Artists use these to push, pull, smooth, and texture. A loop tool can hollow out a face; a sponge can soften edges. Modeling lets you work slowly, making subtle changes as you go.
Unlike carving, modeling doesn’t require heavy tools or protective gear. That’s why it’s the go-to method for children’s art classes and studio workshops. It’s tactile, immediate, and responsive. You feel the material change under your hands. That connection is part of why so many artists return to modeling, even after mastering stone or metal.
One pro tip: keep your clay moist. Dry clay cracks and becomes brittle. Many sculptors use spray bottles or damp cloths to keep it workable. If you’re working on a large piece over days, cover it with plastic wrap overnight to prevent drying.
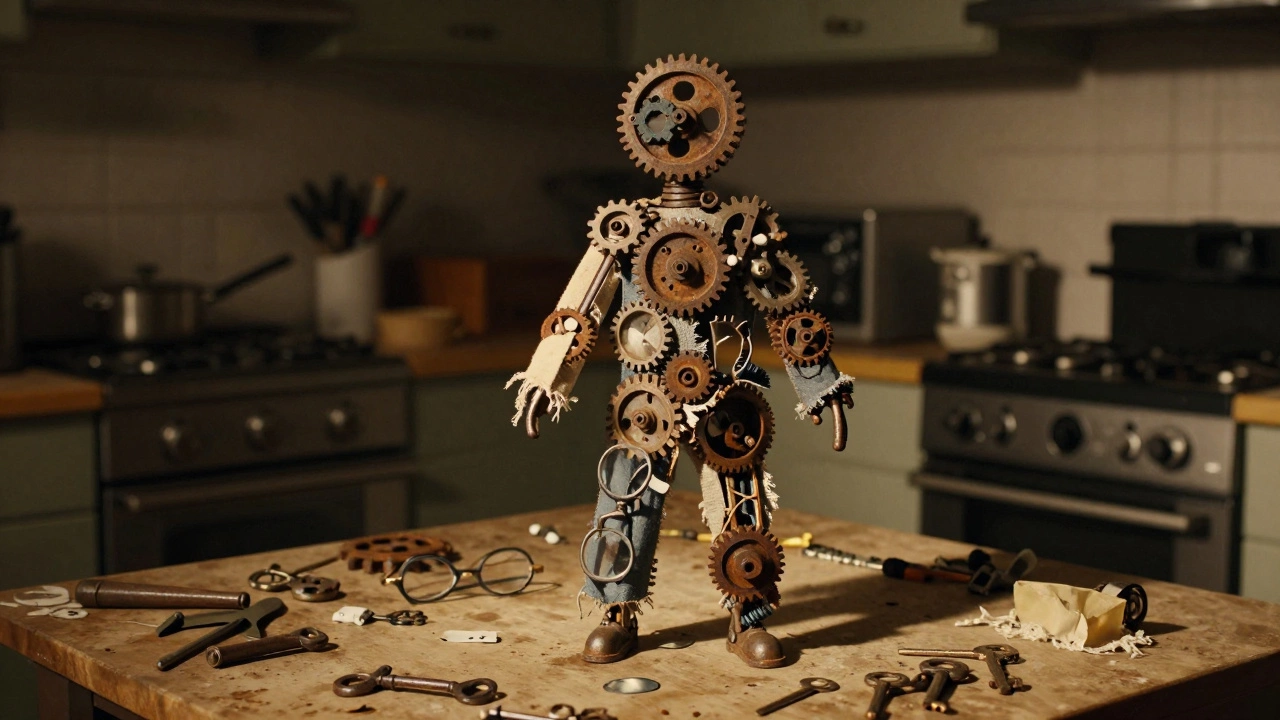
Assemblage: Putting Things Together
Assemblage is the most modern of the four methods. Instead of shaping one material, you combine found objects - anything from old tools and bicycle parts to broken glass, fabric, or even trash. This method exploded in the 20th century with artists like Pablo Picasso and Louise Nevelson, who turned everyday junk into powerful statements.
Assemblage doesn’t require traditional sculpting skills. You don’t need to carve or mold. You need vision. A rusted gear, a child’s shoe, and a length of chain can become a figure if arranged with intention. The challenge isn’t technique - it’s meaning. What does this combination say? Why these objects? How do they relate?
Materials are bonded with glue, wire, bolts, or welding. Metal pieces often need a welder; wood might be screwed together. Some artists leave joints visible as part of the aesthetic. Others hide them for a seamless look. The process is flexible: you can start with a theme and collect objects, or find an object and build around it.
Assemblage is also the most accessible method for people without studio access. You can create powerful work in a garage, a basement, or even a kitchen table. It’s the method that turns ordinary life into art. A pile of old keys can become a crown. A broken mirror can become a face.
Choosing Your Method
Which method should you try? It depends on what you want to make and what you’re comfortable with.
- If you like to build and experiment, start with additive sculpting using polymer clay.
- If you’re drawn to history and precision, try subtractive sculpting with basswood or soapstone.
- If you enjoy touch and texture, go for modeling with air-dry clay and your hands.
- If you’re inspired by everyday objects and want to make art from what’s around you, begin with assemblage.
Most sculptors don’t stick to just one. Many combine methods - modeling a face in clay, then casting it in bronze, and mounting it on an assemblage base. The four methods aren’t rules. They’re tools. The best artists know which one to reach for when.
What You Need to Get Started
You don’t need a fancy studio to begin. Here’s what you really need for each method:
| Method | Materials | Essential Tools |
|---|---|---|
| Additive | Clay, wax | Wire armature, wooden modeling tools, water spray |
| Subtractive | Stone, wood | Chisels, mallet, rasps, safety goggles |
| Modeling | Clay, plaster | Fingers, loop tools, ribs, sponge |
| Assemblage | Found objects, scrap metal, fabric | Glue, wire cutters, pliers, screwdriver |
Start small. A 10cm figure in clay takes less time than a 30cm one. A carved soapstone heart is easier than a full bust. Assemblage can begin with five items from your junk drawer. The goal isn’t perfection - it’s learning how material responds to your hands.
Can you combine sculpting methods in one piece?
Yes, and many artists do. A common approach is to model a face in clay, cast it in bronze using the lost-wax method, then mount it on a wooden base carved with traditional subtractive techniques. Assemblage elements - like metal chains or glass shards - can be added to create contrast. Mixing methods adds depth, texture, and meaning. There’s no rule that says a sculpture has to be made just one way.
Which method is best for beginners?
Additive sculpting with polymer clay is the most beginner-friendly. It doesn’t require sharp tools, it’s easy to fix mistakes, and it dries without special equipment. Modeling with air-dry clay is also great because you can use your hands and household items as tools. Subtractive methods like carving stone or wood require safety gear and more experience. Assemblage is easy to start but harder to master because it’s about concept as much as form.
Do you need a kiln to work with clay?
No, not always. Air-dry clay hardens at room temperature and doesn’t need firing. Polymer clay bakes in a regular home oven at 110-130°C. Only traditional ceramic clay requires a kiln, which reaches temperatures over 1,000°C. If you’re just starting, skip the kiln. Use air-dry or polymer clay until you’re ready to commit to ceramics.
Is stone carving dangerous?
It can be, if you don’t take precautions. Stone dust is harmful if inhaled, and chisels can slip. Always wear a dust mask, safety goggles, and gloves. Work in a well-ventilated area, preferably outdoors or with a dust extractor. Start with soft stones like soapstone or alabaster - they’re easier to carve and less likely to shatter. Never carve without proper training if you’re using power tools.
Can you make sculpture without spending money?
Absolutely. Assemblage is built from found objects - old keys, bottle caps, broken toys, cardboard tubes. Modeling clay can be made at home with flour, salt, and water. Even wood carving can start with a piece of scrap lumber from a construction site. Many artists begin with nothing but their hands and curiosity. The material doesn’t have to be expensive - it just has to matter to you.
Next Steps
Try one method this week. Buy a small block of soapstone and carve a simple shape - a heart, a bird, a face. Or roll a lump of clay into a figure and smooth it with a wet finger. Gather five objects from your home and arrange them into something new. Don’t worry about whether it’s ‘good.’ Just see what happens when you touch the material and make something real.
Sculpture isn’t about having the right tools. It’s about seeing the form inside the material - and having the courage to let it out.
