Digital Art Workflow Finder
Answer three simple questions to find the perfect free tool and workflow for your artwork.
Primary Tool
Step-by-Step Guide
You’ve just finished a sketch that you’re really proud of. The lines are crisp, the shading feels right, and you can’t wait to see it on your tablet or computer. But there’s a catch: it’s stuck on paper. You want to take it to the next level-coloring it digitally, adding effects, or just sharing it online without the glare of a flash photo. The problem is, most people think they need an expensive scanner or a pricey iPad Pro to make this happen. They don’t.
Converting your physical artwork into a clean digital file is easier than ever, especially if you stick to free tools. Whether you have a smartphone, a cheap flatbed scanner, or just a camera, you can get professional results without spending a dime. This guide breaks down exactly how to do it, from capturing the image to cleaning up the messiness of real-world lighting and paper texture.
The Quick Summary: Your Best Free Options
- For Instant Cleanup: Use ibisPaint X or MediBang Paint. These mobile apps have built-in "scan" features that automatically remove shadows and enhance lines.
- For Vector Graphics: Use Inkscape. It’s a free desktop program that turns raster images (pixels) into vectors (mathematical paths), perfect for logos and clean illustrations.
- For High-Res Scanning: Use VueScan (free version) or your operating system’s native scanner app if you have a physical scanner.
- For Basic Editing: Use GIMP or Photopea (online) to adjust levels and contrast manually.
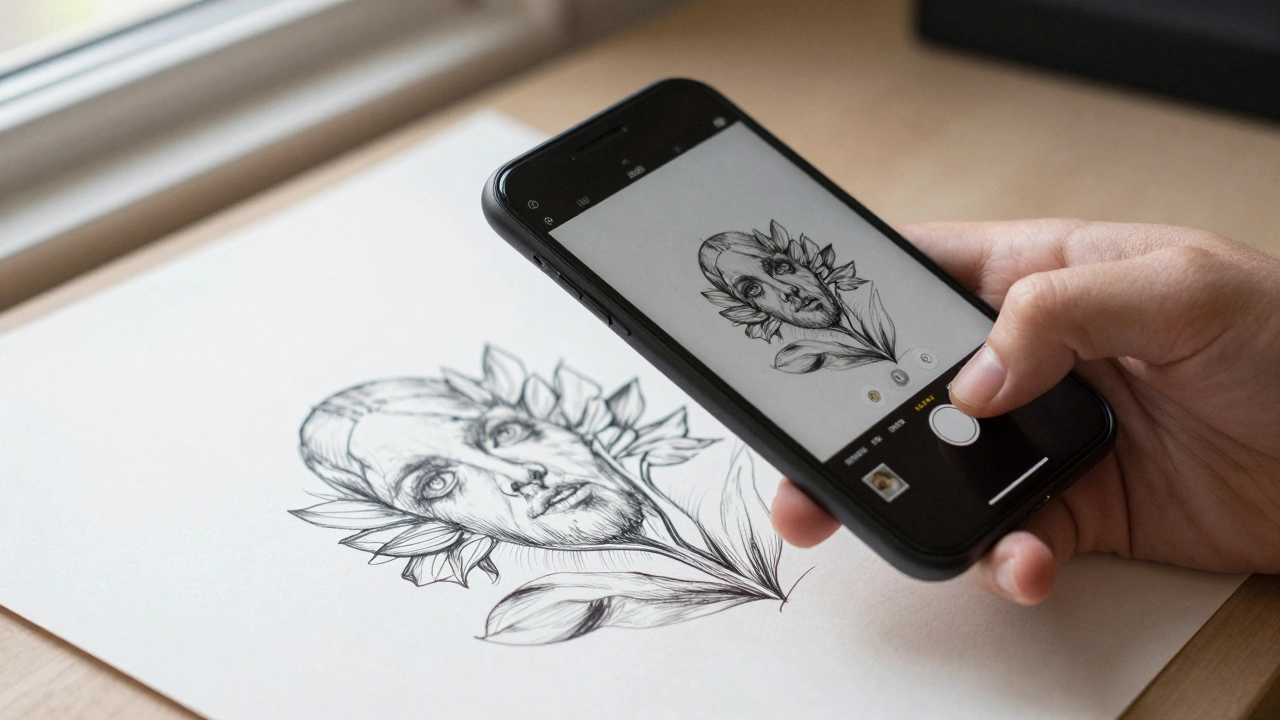
Method 1: The Smartphone Scan (Fastest & Easiest)
If you don’t have a scanner, your phone is your best friend. However, taking a regular photo often leaves you with uneven lighting, shadows from your hand, and a perspective distortion that makes the paper look trapezoidal. To fix this, you need an app that processes the image specifically for line art.
I recommend starting with ibisPaint X. It’s a popular drawing app available on iOS and Android, but its scanning feature is surprisingly powerful for free users. Here’s how to use it effectively:
- Open ibisPaint X and tap the "Import" button, then select "Camera."
- Position your drawing under even light. A window with indirect sunlight works best. Avoid direct overhead lamps that create harsh shadows.
- Frame your drawing so the edges are visible. The app will try to auto-detect the corners.
- Tap the shutter. The app will immediately offer filters like "Black & White," "Line Art," or "Color." For ink drawings, "Line Art" usually gives the cleanest result by stripping away gray tones and boosting the contrast between the paper and the ink.
Another excellent option is Adobe Scan. While it’s designed for documents, its OCR (Optical Character Recognition) engine is great at flattening perspectives and removing background noise. Just remember to export as PNG rather than PDF if you plan to edit the image further.
| App Name | Best For | Platform | Key Feature |
|---|---|---|---|
| ibisPaint X | Artists & Illustrators | iOS, Android | One-tap line art enhancement |
| Adobe Scan | Clean Documents & Sketches | iOS, Android | Perspective correction & shadow removal |
| Flat Scanner Pro | High-Quality Photos | iOS, Android | Manual control over threshold levels |
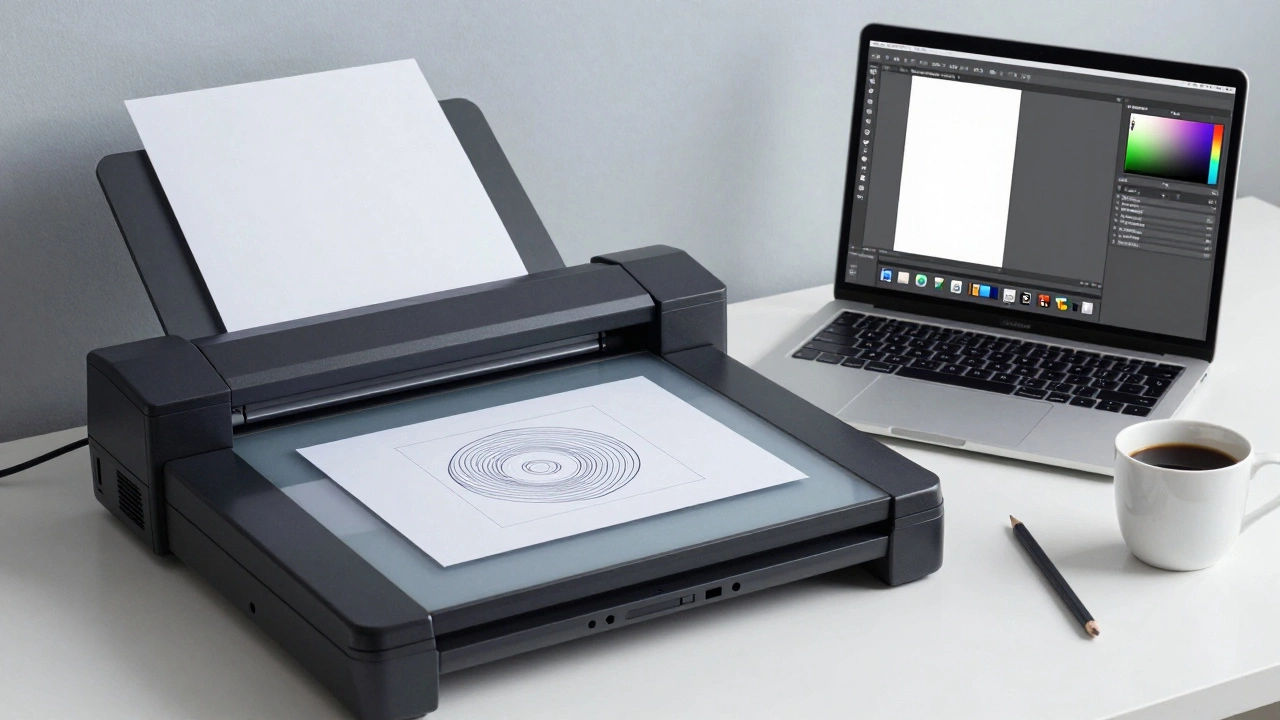
Method 2: Using a Flatbed Scanner (Highest Quality)
If you have access to a library, a print shop, or an old printer at home, a flatbed scanner will always give you better results than a camera. Cameras capture light reflecting off the surface; scanners illuminate the page evenly from below. This means no shadows, no glare, and perfectly straight edges.
Most modern printers come with basic scanning software, but it’s often bloated with ads or upsells. Instead, use VueScan. The free version allows you to scan in color or grayscale at high resolutions (up to 4800 dpi). If you only need black and white line art, set the mode to "Grayscale" and the resolution to 300 dpi. Anything higher than 600 dpi is usually unnecessary for screen display and will just bloat your file size.
Once you have the scanned image, you’ll likely notice that the white paper isn’t pure white-it might be slightly gray or yellowed. This is where manual editing comes in. Open your scan in GIMP (the free alternative to Photoshop). Go to Colors > Levels. You’ll see a histogram. Drag the white triangle on the right all the way to the edge of the histogram data. This tells GIMP to treat the brightest pixels as pure white, instantly brightening your background. Then, drag the black triangle on the left inward slightly to darken your lines. Hit OK, and your drawing looks professionally cleaned up.
Method 3: Turning Pixels into Vectors (Infinite Scalability)
Here’s a secret many beginners miss: when you scan or photograph a drawing, you create a raster image. This means it’s made of pixels. If you zoom in too much, it gets blurry or blocky. If you want your logo or illustration to scale infinitely without losing quality-for example, printing it on a t-shirt or a billboard-you need to convert it to a vector.
The best free tool for this is Inkscape. It uses a process called "trace bitmap" to analyze your pixel-based image and draw mathematical paths along the edges of your lines.
- Install Inkscape (available for Windows, Mac, and Linux).
- Import your scanned or photographed drawing (File > Import).
- Select the image and go to Path > Trace Bitmap.
- In the dialog box, choose "Brightness cutoff" for simple black-and-white drawings. Adjust the threshold slider until the preview looks sharp. For shaded drawings, try "Edge detection" or multiple scans for gradients.
- Click OK. Inkscape creates a new vector layer on top of your original image. Delete the original image layer, and you’re left with a scalable vector graphic (SVG).
This method is incredibly useful if you plan to use your art in design projects where resizing is frequent. It also allows you to change the color of your lines globally by simply selecting the paths and changing the fill/stroke color, rather than painting over them pixel by pixel.
Troubleshooting Common Issues
Even with the best tools, things can go wrong. Here’s how to fix the most common headaches when digitizing hand-drawn art.
Problem: My Lines Look Fuzzy or Jagged
This usually happens because the resolution is too low or the anti-aliasing is off. If you’re using a phone app, ensure you’re exporting in the highest quality possible. If you’re using GIMP, check that the image is at least 300 DPI. If you’re converting to vector in Inkscape, fuzzy lines often mean the threshold was set incorrectly. Try lowering the brightness cutoff to include more of the lighter pencil strokes, or use a darker pen next time.
Problem: There Are Still Shadows or Uneven Lighting
If automatic tools didn’t catch the shadows, you’ll need to do it manually in GIMP or Photopea. Use the "Curves" adjustment. Pull the curve into an 'S' shape: lift the whites up and push the blacks down. This increases contrast dramatically, often washing out subtle shadows. If a shadow persists, use the "Clone Tool" to sample a clean area of white paper and paint over the shadow.
Problem: The Paper Texture Is Visible
Some papers have a heavy grain that shows up in scans. If you want a smooth, digital look, you can apply a slight Gaussian Blur to the background layer before adjusting levels. Alternatively, in Inkscape, when tracing, increase the "Smoothing" parameter in the trace settings. This simplifies the paths and removes minor imperfections caused by paper texture.
Pro Tips for Better Results
- Use Dark Paper: If you’re struggling with white balance, try drawing on black or dark blue paper with white gel pens. It’s easier for software to isolate bright lines against a dark background than vice versa.
- Light Box Trick: Place your drawing on a glass table near a window. The light coming from below acts like a cheap light box, making the lines pop and reducing surface texture visibility.
- Keep Layers Separate: When you import your scan into a drawing app like Krita or MediBang, place it on the bottom layer. Lock that layer. Create a new layer above it for coloring. This prevents you from accidentally smudging your original lines while working.
Frequently Asked Questions
Is it better to use a scanner or a phone camera?
A scanner is objectively better for quality because it provides even lighting and eliminates perspective distortion. However, a phone camera is faster and more convenient. If you’re doing quick sketches or social media posts, a phone app like ibisPaint X is sufficient. For final artwork intended for print or professional portfolios, invest time in using a flatbed scanner.
Can I digitize pencil drawings?
Yes, but it requires more effort. Pencil leads vary in darkness, which can confuse automated scanning tools. When scanning pencil work, use the "Grayscale" mode instead of "Black & White" to preserve shading details. You may need to manually adjust the curves in GIMP to darken the graphite enough for the software to recognize it as line art.
What is the best free software for editing scanned art?
GIMP is the most powerful free option for raster editing (pixels). For vector conversion, Inkscape is the industry standard among free tools. If you prefer working directly in a browser, Photopea offers a Photoshop-like interface for free, though it includes ads.
Why does my digital drawing look blurry when I zoom in?
This happens because your image is raster-based (made of pixels). Raster images have a fixed resolution. When you zoom in beyond that resolution, the software has to guess what the missing pixels should look like, resulting in blurriness. To fix this, convert your image to a vector format using Inkscape, which uses mathematical equations to define shapes, allowing infinite scaling.
Do I need to buy special paper for digitizing?
No, you can use any standard printer paper. However, smoother paper (like Bristol board) yields cleaner scans because it has less texture. Heavily textured watercolor paper can introduce noise into your digital file, requiring more cleanup time in post-processing.