Sculpting Tips: Simple Projects, Low‑Cost Materials and Quick Fixes
If you’ve ever stared at a block of clay and wondered where to begin, you’re not alone. Sculpting can feel intimidating, but the right tips turn that blank piece into something you actually enjoy making. Below you’ll find straightforward ideas you can start today, plus ways to keep costs low and avoid common hiccups.
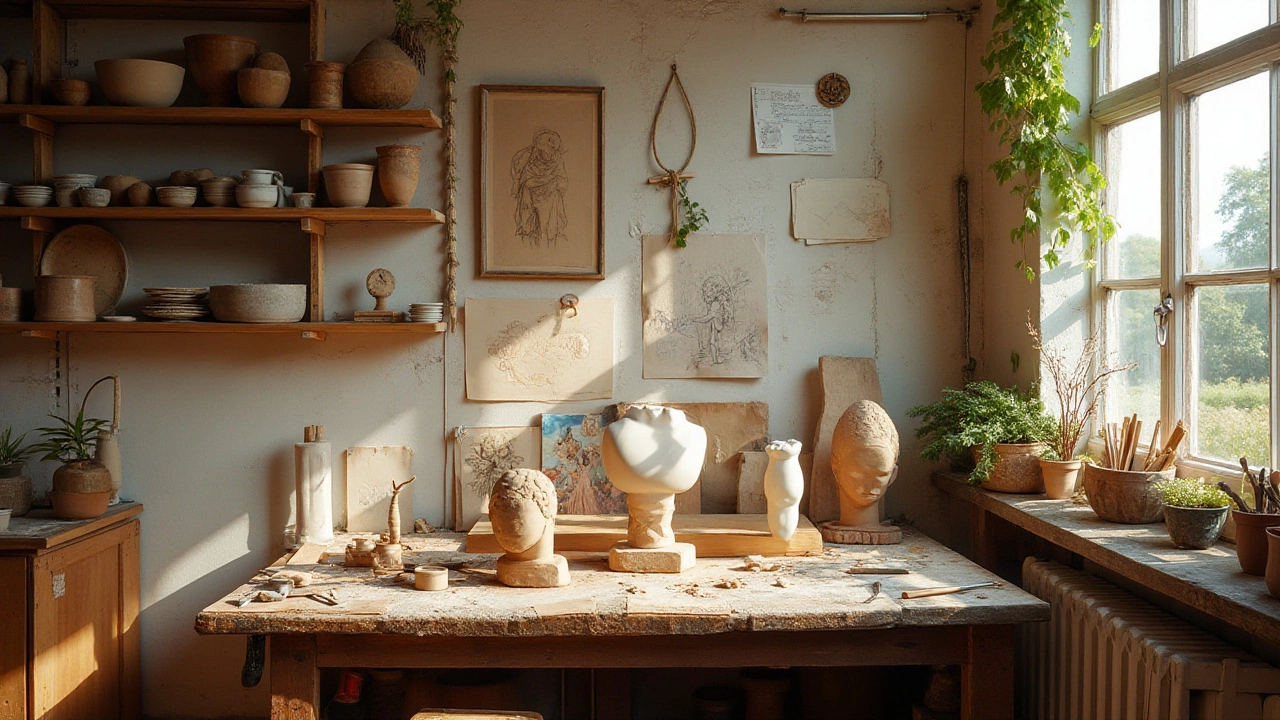
Start Small: Easy Projects for New Sculptors
Jumping straight into a life‑size figure is a recipe for frustration. Begin with a handful of simple shapes—think basic animals, fruit, or abstract forms. A good starter is a smooth‑sided sphere turned into a playful owl or a goofy cartoon head. Use a soft modeling clay that stays pliable for a few hours; it lets you add and subtract without breaking. Work in stages: rough shape first, then add details once the base feels solid. This method mirrors the advice in our "Easiest Sculptures for Beginners" post, where we stress the power of breaking a project into bite‑size steps.
While you’re shaping, keep a set of everyday tools handy: a butter knife, a toothbrush, and an empty wine cork. They’re perfect for carving, smoothing, and texturing without spending a penny on specialty kits. Remember, the goal isn’t perfection; it’s learning how the material behaves and building confidence.
Stretch Your Budget: Cheap Materials That Work
Quality sculpting supplies can be pricey, but great work doesn’t have to break the bank. Start with household items: newspaper strips for papier‑mâché, plaster of Paris from a hardware store, or even recycled cardboard for armatures. Mix a simple glue‑water paste to bind paper layers—once dry, it feels surprisingly sturdy and can be sanded for a smoother finish.
If you prefer clay, look for bulk packs of air‑dry or polymer clay on discount sites. A small amount stretched over several projects often costs less than a single premium stone block. For metal effects, coat a cheap plaster core with copper foil or aluminum foil; the metal sheets add texture and shine without the cost of solid metal.
Our "Cheapest Materials for Sculpture" guide breaks down exact prices, so you can compare options and pick the one that fits your wallet. The key is to treat every cheap material as a test canvas—experiment, learn, and then decide if you want to invest in higher‑grade supplies later.
Even with budget-friendly tools, mistakes happen. If a piece cracks while drying, gently sand the edges and re‑apply a thin layer of your binder. For accidental fingerprints on a polymer model, a quick wipe with a damp cloth before the final cure can save you a lot of sanding later. Small fixes keep the project moving forward without needing a full redo.
Finally, keep a photo log of each stage. Snap a picture before you add a new detail, then compare it after you finish. This visual diary helps you spot where you improved and where you might want to try a different technique next time. It also makes sharing your progress with friends—or on social media—a breeze.
With these practical sculpting tips, you’ve got a roadmap that’s both affordable and beginner‑friendly. Grab that clump of clay, a couple of household tools, and start shaping something today. The more you practice, the faster you’ll move from simple owls to the projects you’ve always dreamed of creating.
3 Dec 2024
Embarking on the journey of sculpture art can be both exciting and rewarding. This guide offers essential tips and insights for beginners, covering the basics from understanding materials to exploring different techniques. Discover how to set up your workspace and find inspiration for your creations. Learn about fascinating facts and the significance of patience, creativity, and practice in mastering the sculpting craft.
Continue reading...