When you start an oil painting, one of the first decisions you face is: background first, or last? It seems simple, but this choice shapes everything - your brushwork, your color mixing, even how long the painting takes to finish. There’s no single right answer, but there are clear advantages and pitfalls depending on what you’re trying to achieve.
Why Some Painters Start with the Background
Painting the background first is a classic approach, especially for beginners. It gives you a clean canvas to build on. You lay down a flat tone - maybe a muted green for a landscape, a warm gray for an interior scene - and let it dry. This creates a base that unifies the whole painting. Think of it like laying floor tiles before putting furniture in a room. The background sets the mood, the lighting, the temperature of the space.
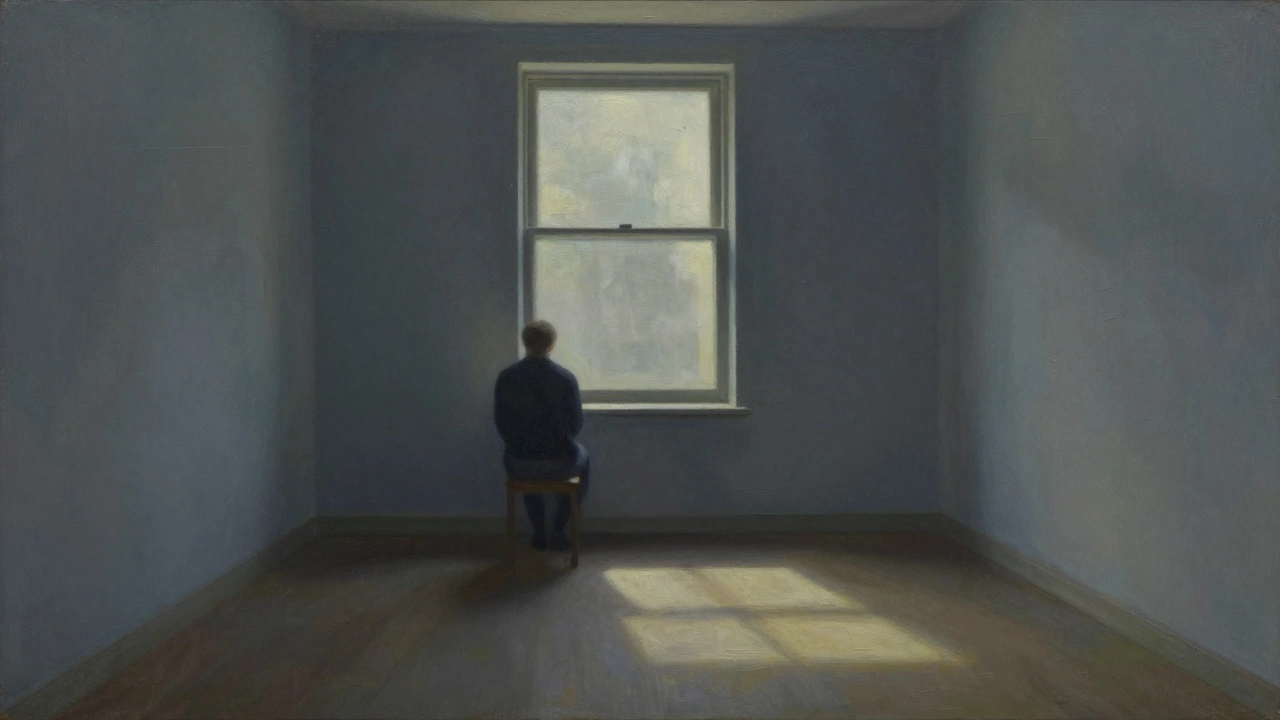
Artists like Johannes Vermeer and Edward Hopper used this method. Vermeer’s interiors often have soft, even backgrounds that make the figures pop. Hopper’s lonely scenes rely on flat, atmospheric backgrounds to amplify isolation. If you’re painting something with strong contrast - a bright figure against a dark room - starting with the background helps you get the value right from the start.
There’s also a practical side. Oil paint takes days to dry. If you paint the background first, you can let it cure while you work on the foreground. This avoids smudging. You’re not rushing. You’re working in layers, like a slow-cooked stew.
The Hidden Problem: Backgrounds That Stick
But here’s where it gets messy. Oil paint doesn’t just dry - it oxidizes. The surface becomes less absorbent over time. If you paint the background first and then come back to it days later, your new layers might not stick well. You’ll get uneven coverage. Colors look dull. Brushstrokes lift instead of blending. It’s called “sinking in,” and it’s one of the most frustrating issues in oil painting.
That’s why many professionals avoid painting large background areas too early. Instead, they paint the whole composition loosely at first - background, middle ground, foreground - all in thin washes. This is called an imprimatura or underpainting. It’s not a finished background. It’s a map. You’re sketching in values and colors with turpentine-thinned paint. Once that’s dry, you build up the details.
What About Painting the Background Last?
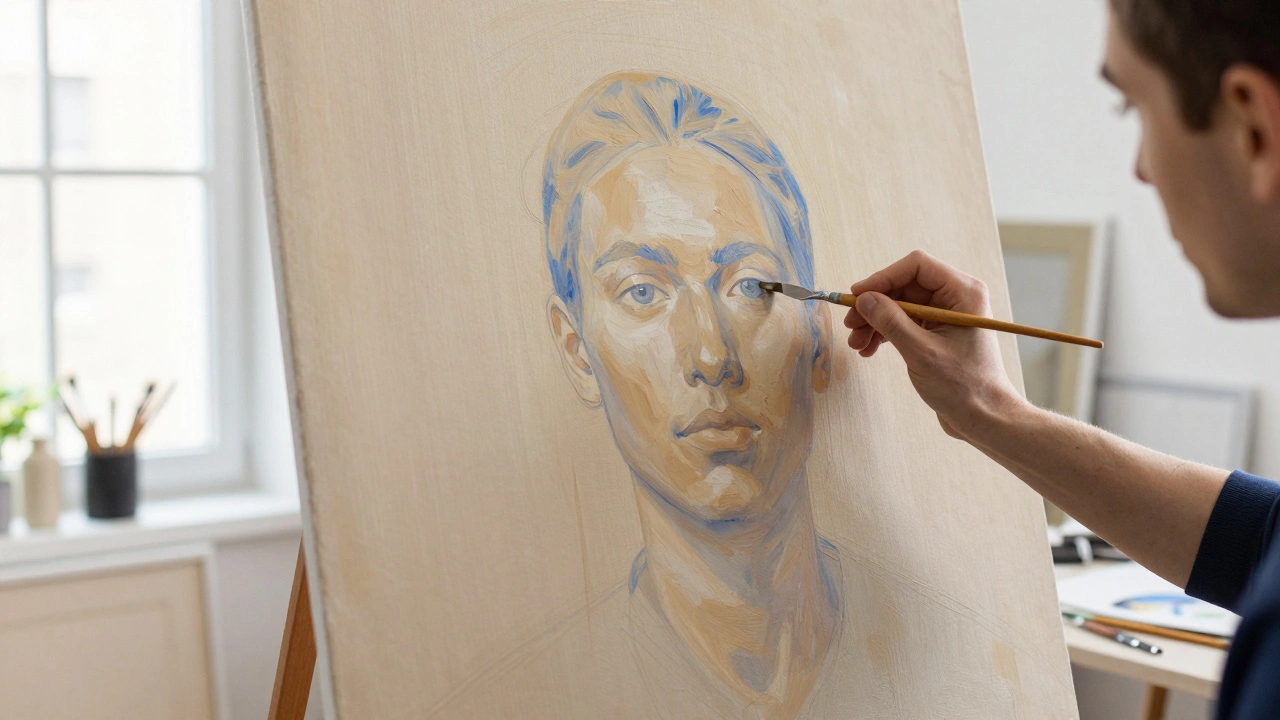
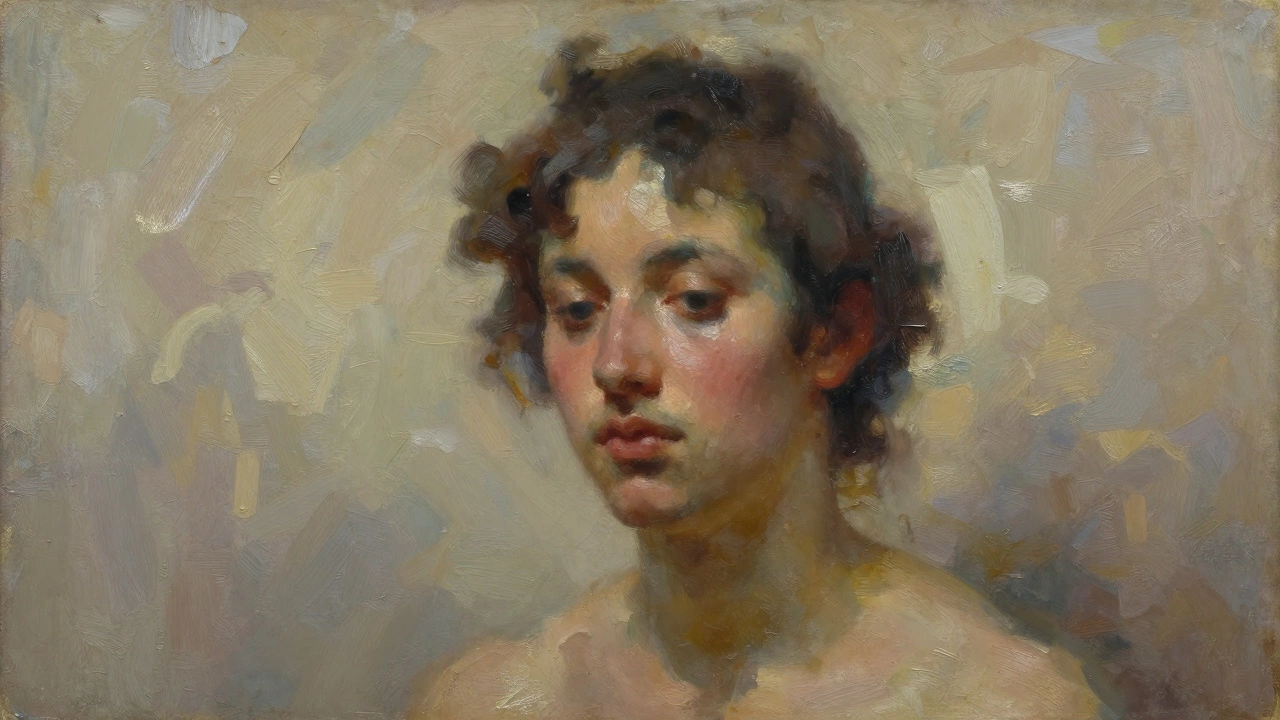
Some artists, especially those working in a more expressive style, paint the background last. They block in the main subject - a face, a vase, a tree - and then paint around it. This gives them total control over the edge. You can blend the background softly into the subject, or keep it sharp. You can adjust the color to match exactly what the subject needs.
Think of it like framing a photo. You don’t hang the frame before you’ve chosen the picture. You choose the picture first, then find the right frame to make it sing. In oil painting, the background is the frame. If you paint it too early, you might lock yourself into a color that doesn’t work with the final tones of your subject.
Modern painters like David Hockney and Lucian Freud often worked this way. Freud’s portraits have backgrounds that feel like they were painted right after the skin tones - adjusting, shifting, responding. You can see the brushwork move from flesh to wall in one continuous thought.
When to Choose One Over the Other
There’s no universal rule. But here’s how to decide:
- Paint the background first if: Your subject has a clear, static position. You’re painting a still life, a portrait with a plain wall behind, or a landscape with a wide sky. You want the background to unify the scene.
- Paint the background last if: Your subject is complex, textured, or changes shape. Think of a figure with flowing hair, a still life with overlapping objects, or a scene with dramatic lighting. You need flexibility to match the background to the final tones.
There’s also a third option - and it’s often the smartest. Paint the background in stages. Start with a thin wash of the general color. Let it dry. Then, after you’ve painted the subject, come back and refine the background with thicker paint. This gives you the stability of an early base and the control of a late finish.
Practical Tips for Oil Painters
Here’s what actually works in the studio:
- Start with a toned canvas. Mix a neutral color - burnt sienna and ultramarine blue - and thin it with turpentine. Paint the whole surface. This eliminates the blinding white and helps you judge values better.
- Block in shapes with thinned paint. Don’t worry about details. Just get the big forms down. This includes the background areas. You’re not finishing them - you’re mapping them.
- Let the underpainting dry for at least 24 hours. Oil paint needs time to set. Rushing this step leads to muddy colors later.
- Work from background to foreground, but don’t finish the background yet. Keep it loose. Use a soft brush. Leave room to adjust.
- When the subject is 80% done, return to the background. Add depth, soften edges, or darken areas that need more contrast. This is when the painting comes alive.
Many painters I’ve talked to - from students in Sheffield to professionals in London - say the same thing: the background is never really done. It’s always responding to what you’ve painted next to it. That’s the magic of oil. It’s not about order. It’s about conversation.
Common Mistakes to Avoid
Here’s what goes wrong, and how to fix it:
- Mistake: Painting a bright, saturated background too early. Fix: Keep it muted. You can always add color later, but you can’t take it away.
- Mistake: Trying to blend the background into the subject with wet paint. Fix: Wait for the subject to dry. Then use a dry brush with minimal paint to softly feather the edge.
- Mistake: Ignoring the background until the very end, then rushing it. Fix: Give it attention early, even if it’s just a wash. It’s not a filler - it’s part of the story.
One painter I know in Sheffield, who teaches at the Northern School of Art, always says: "Your background is the air around your subject. If you don’t paint the air, the subject has nowhere to breathe." It sounds poetic, but it’s true. The background isn’t empty space. It’s the environment. It’s the light. It’s the silence between notes.