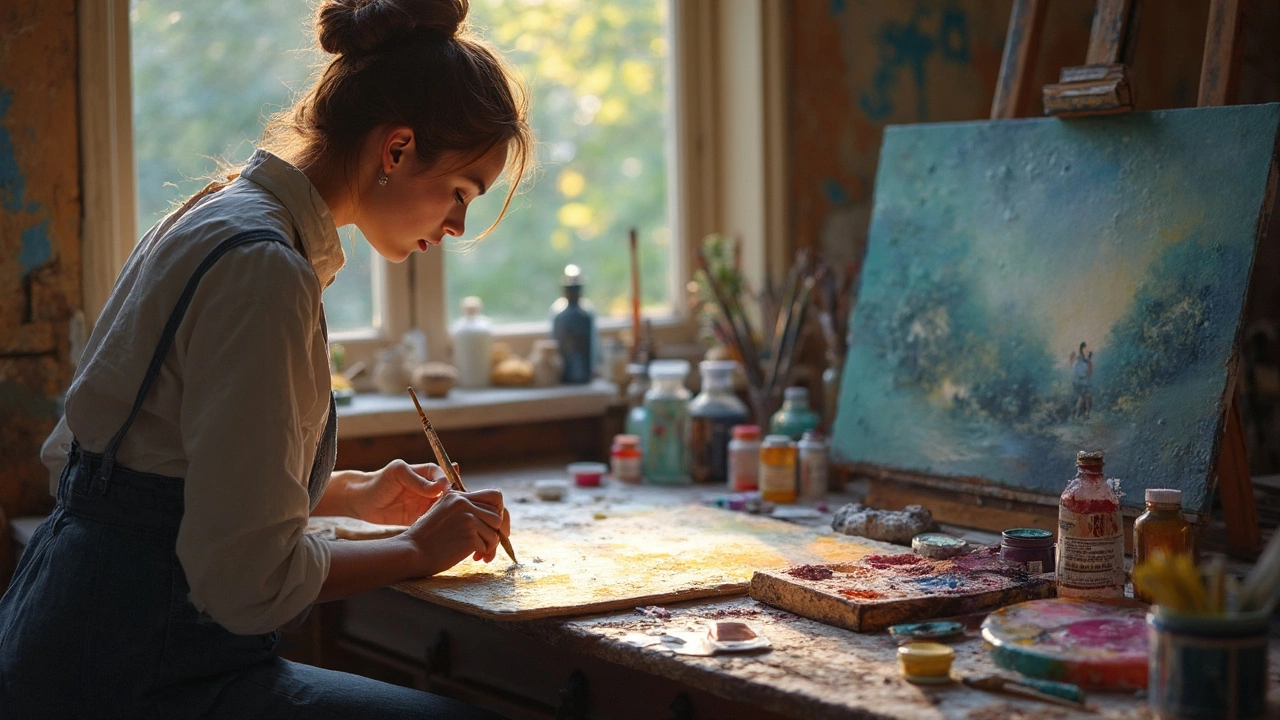
Scumbling sounds fancy, but it’s actually one of the easiest ways to add depth and light to your oil paintings. Think of it like rubbing on a thin, slightly see-through layer of lighter paint over a darker area. You get a soft, hazy look—almost like a thin fog has settled on your canvas. This trick is handy when you want highlights, gentle color shifts, or just a bit of mysterious glow in your art.
Instead of mixing paints together before you even touch the canvas, scumbling lets you build up color right on your work. For example, say you’ve painted a blue sky, but it looks too flat. Using scumbling, you can lightly sweep on a pale white or yellow, making the sky look dreamy without hiding the blue underneath. It works wonders for clouds, skin tones, distant hills—really anywhere you want a softer edge or a touch of shimmer.
- What is Scumbling?
- How Scumbling Works in Oil Painting
- Tools and Materials You Need
- Classic Artists Who Used Scumbling
- Common Mistakes and Easy Fixes
- Helpful Tips for Getting Started
What is Scumbling?
Scumbling is a classic trick in oil painting that artists use to soften colors, make pictures look more alive, and add subtle glowing effects. Basically, you take a small amount of lighter or more opaque paint and gently scrub it over a dry, darker layer. The new layer is thin enough that the color underneath shows through, kind of like a thin mist or dust on the surface. The result? A beautiful blend of the two layers that gives paintings a sense of depth you just can’t get with regular mixing.
Scumbling isn’t the same as glazing. In glazing, you work with very thin, transparent washes of color. With scumbling, the layer is more opaque, and you’re aiming for a broken, patchy effect. The brush or even a finger or rag can leave little streaks or dotted patches, so it never looks flat or overblended. This technique helps create highlights on skin, shimmer on water, and haze in distant landscapes. Old-school painters like J.M.W. Turner and Rembrandt used scumbling when they wanted soft light or atmospheric effects in their art.
Here’s what makes scumbling stand out:
- The new paint layer is usually lighter or more opaque than the layer below.
- The paint should be dry underneath before you start.
- The scumbled layer is patchy and lets the bottom color peek through.
You’ll often see scumbling used for clouds, fog, sunbeams, or anywhere you want to quieten harsh lines or blend colors smoothly without losing their richness. Once you try this, you’ll see just how much life and light it brings to your work.
How Scumbling Works in Oil Painting
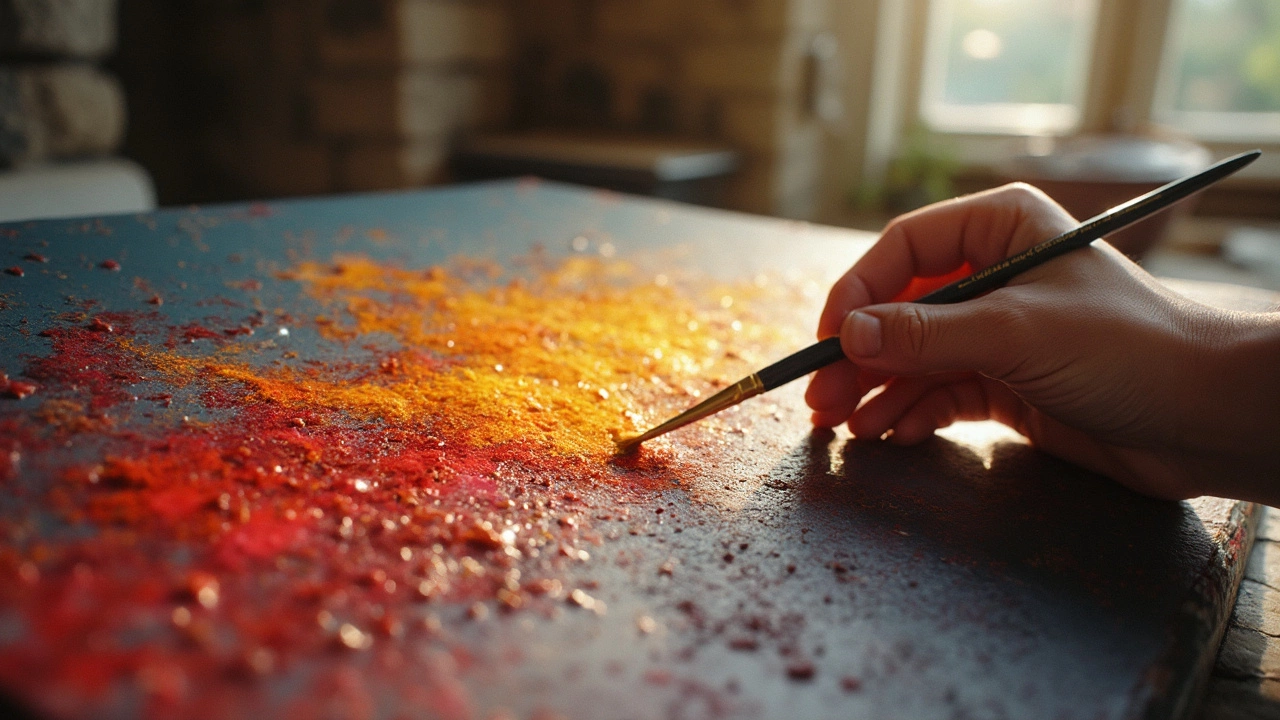
Scumbling is basically about layering a thin, almost dry layer of lighter paint over a darker dry layer. Unlike glazing, which uses really runny paint, scumbling is more about using a brush loaded with thick-ish, opaque or semi-opaque color. The point is to let some of the color underneath peek through.
You want to use a soft touch. If you press too hard, you’ll just mix the new paint in with the old and lose the effect. The brush is usually held kind of sideways or flat, and dragged gently across the surface. You’re not trying to fully cover the lower layer—instead, you want a broken look, kind of like dust settling and catching the light in spots. Using a stiff bristle brush or even your finger can give better results than a super soft brush.
Here's a simple way to try scumbling on your next painting:
- Wait until your underpainting is totally dry. This step is key—otherwise, you could just end up mixing the layers into a mushy mess.
- Pick a lighter color, or even just white. It should be a little on the thicker side—not watery.
- Dab off most of the paint on a scrap rag or paper towel so your brush is almost dry.
- Lightly brush or scrub the paint across the area you want to lighten. The little bumps and textures on your canvas will help break up the paint, creating that classic scumbled look.
This technique is perfect for brightening clouds, adding the illusion of mist, or giving skin textures a more realistic vibe. Tons of artists use scumbling for subtle highlights and for making colors pop in a really natural way.
| Scumbling vs. Glazing | What's Different? |
|---|---|
| Paint Thickness | Scumbling uses thicker, drier paint; glazing uses thin, transparent washes. |
| End Effect | Scumbling gives a soft, frosty look; glazing makes colors look deeper and shinier. |
| Best for | Highlights, haze, atmosphere; glazing is for rich shadows and color shifts. |
The real secret is patience and not overworking it. When done right, scumbling makes a world of difference, and honestly, it’s way less stressful than it sounds.
Tools and Materials You Need
You don’t need a studio full of stuff to start scumbling, but there are a few things that make the process smoother. For scumbling with oil paints, the tools you choose can change how your results look and feel.
- Paintbrushes: Stiff-bristled brushes work best for dragging paint over dry layers. Try hog bristle or synthetic fan brushes. If you want softer edges, a dry round or filbert brush will do the trick.
- Paints: Standard oil paints are just fine, though you’ll get a nice effect using lighter, more opaque colors over dark. Think titanium white, Naples yellow, or a pale blue.
- Palette: A flat palette lets you mix just enough paint for thin, dry layers. Glass or wood works great.
- Palette knife: Not everyone uses these for scumbling, but some artists like to scrape back or thin out thick patches.
- Rags or paper towels: Always handy for wiping off extra paint or adjusting the softness of that hazy layer.
- Mediums (optional): If you want the paint to flow just a little easier, add a tiny bit of linseed oil or odorless mineral spirits. But keep it lean—thicker paint gives you more control for scumbling.
Before you get going, double check your setup. Here’s a quick table to help you pick your main tools:
| Tool | Best For | Quick Tip |
|---|---|---|
| Hog Bristle Brush | Textured, rough scumbling | Use dry for broken color effect |
| Synthetic Fan Brush | Clouds, soft edges | Sweep gently for a misty look |
| Titanium White Paint | Highlights, lightening areas | Opaque and covers well |
| Rags/Paper Towels | Controlling paint amount | Blot brush before scumbling |
One last thing: if you ever wonder if your paint is too wet or too thick, test on a spare bit of canvas first. The best scumbling happens with almost dry, scrubby paint so you keep that see-through layer.
Classic Artists Who Used Scumbling
Scumbling isn’t just a modern trick—lots of legendary painters leaned on it to make their works pop. Even the biggest names in art history turned to this technique to bring out light, texture, and mood in their oil paintings. When you look at works from the Old Masters, you’re probably seeing scumbling at its best, even if you didn’t realize it.
Rembrandt is a name that comes up a lot when people talk about oil painting wizardry. He loved layering thin, misty paint over rough textured areas, especially in his famous portraits. This added a ton of lifelike glow to the skin and a soft touch around the eyes and hair. In his painting "The Jewish Bride", if you look closely, you’ll see scumbling used to bring out the glint of jewelry and show depth in the folds of cloth.
J.M.W. Turner is another big one. If you’ve ever seen his landscapes, you probably remember the shifting colors and ghostly light. Turner was known for using scumbling to get those foggy skies and glimmering sunlight. In his oils, he’d rub or brush a thin, pale layer over dried color to get that dreamy, atmosphere-heavy effect—kind of like sunlight breaking through mist.
Even more recently, John Singer Sargent used scumbling to capture soft skin tones and natural light. In works like "Lady Agnew of Lochnaw" you’ll spot it in the background and her dress, giving everything a gentle vibe without muddying the colors underneath.
| Artist | Famous Work | How They Used Scumbling |
|---|---|---|
| Rembrandt | The Jewish Bride | Added luminous highlights and skin details |
| J.M.W. Turner | Rain, Steam and Speed | Created misty light effects and atmospheric skies |
| John Singer Sargent | Lady Agnew of Lochnaw | Softened background and fabric, natural light on skin |
What’s wild is that all of these artists used different tools—sometimes a dry brush, or even bits of cloth and fingers. That proves there isn’t just one way to do scumbling, and playing around with your own methods is part of the fun (and the learning). Next time you see a classic oil painting glowing from across the room, you’ll know there’s probably some scumbling magic at work.
Common Mistakes and Easy Fixes
Lots of beginners jump into scumbling and run into the same speed bumps. If your paint goes muddy or the top layer totally covers the bottom, you’re not alone. Most issues come down to paint thickness, brush choice, or just trying to rush the process.
- Too much paint on the brush: Scumbling only works if you keep the top layer thin and dry. If your brush is loaded, you’re basically painting, not scumbling, and you lose that see-through effect.
- Working wet-on-wet instead of dry-on-dry: The bottom layer needs to be dry, or nearly dry. If not, colors mush together, and everything turns blah. Oil paint often takes a day or longer to dry, so patience actually pays off.
- Wrong brush for the job: Big, soft brushes or worn-out bristles work best. Hard, new brushes can leave harsh lines, which ruins the atmosphere you’re after.
- Over-blending: Scumbling isn’t about scrubbing in circles or pushing paint around until it disappears. Keep your motions light, almost like dusting.
- Ignoring color choices: Lighter or opaque colors on top work great for that glowing look. Transparent colors won’t give you the pop you want.
Here’s a quick table to show the most common scumbling slip-ups and how to set them straight:
| Mistake | What Happens | How to Fix It |
|---|---|---|
| Too much paint | Opaque mess, covers underpainting | Wipe brush on paper towel, use barely any paint |
| Wet underpainting | Colors blend or smear | Wait for bottom layer to dry before scumbling |
| Wrong brush | Streaky or patchy effect | Use an old, soft, or worn-out brush—think fluffy, not stiff |
| Overworking area | Loss of glow, flat result | Layer lightly and stop once you see the effect |
| Poor color choice | Lackluster, dull scumble | Pick light, opaque paints (like titanium white or naples yellow mixes) |
If you mess up, the fix is usually simple—let the area dry, go over it with a fresh scumble, and remember: less is more. Once you recognize these mistakes, you’ll get cleaner, richer results and actually have fun playing with different effects.
Helpful Tips for Getting Started
If you’re itching to try scumbling but aren’t sure where to begin, here are some practical tips and facts to get the results you want without a ton of stress.
- Use dry brushes: Soft, dry brushes work best. Some artists even use old, beat-up ones for more character. Round or fan brushes are top picks for this move.
- Thin paint is key: Mix your paint with a touch of medium, like linseed oil, but keep it on the drier side so it doesn’t drip or get goopy.
- Wait until the base is dry: Scumbling works best on a dry or almost dry surface, usually after waiting at least 24-48 hours. This way, the fresh paint sits on top instead of blending in.
- Less is more: Don’t overload your brush. Wipe off extra paint on a paper towel before you touch the canvas. Light, gentle sweeps are the secret.
- Practice on scraps: Before you tackle your big painting, try scumbling on a practice board or even some cardboard. You’ll get a feel for controlling the brush and the effect.
Scumbling takes patience. Don’t rush it or try to cover big areas in one go. If you want a richer look, add layers—but always let each one dry so things don’t get muddy.
Here’s a quick table for comparing paint types and the drying times you’ll deal with before scumbling:
| Paint Type | Average Drying Time (Hours) |
|---|---|
| Oil Paint (thin layer) | 24-48 |
| Oil Paint (thick layer) | 48-120 |
| Alkyd Quick-Dry Oil Paint | 6-24 |
If you’re ever stuck, there’s no shame in checking out YouTube demos or online art forums. Lots of artists started just where you are and are happy to share what worked for them. And hey, if you see little paw prints on your palette... well, that’s just Whiskers trying to help.