Ever stared at a painting that just pulled you in, almost like you could step right into the scene? That's not luck—it's strategy. There's a sneaky little trick artists have been using for centuries to make landscapes feel alive and perfectly balanced. It’s so simple you’ll wonder how you missed it: the rule of thirds. This one thing can turn a dull painting into something that grabs your attention every single time you walk past.
Grab a canvas and stick around. We’re unpacking why your favorite landscapes look so good—and how you can steal those secrets for your own work, whether you’re using oils, acrylics, watercolors, or even snapping photos on your phone.
Breaking Down the Rule of Thirds in Landscape Painting
So what exactly is the rule of thirds, and why does it matter for landscape painting? Imagine your canvas split into nine equal squares, like a tic-tac-toe board. Two equally spaced horizontal lines, intersected by two equally spaced vertical lines, create four corners and nine miniature rectangles. Here’s where it gets interesting—the points where those lines cross are the sweet spots in your composition, called ‘power points.’
This idea isn’t new. Leonardo da Vinci sketched out similar guides as early as the 15th century, and Japanese Ukiyo-e painters built serene landscapes by intuitively balancing elements along these lines. Studies from visual psychology, like one from the University of York in 2014, have shown that our eyes are naturally drawn to these intersection points, not just the center of a scene. In other words, placing your main subject away from the center feels more dynamic and—oddly enough—just right.
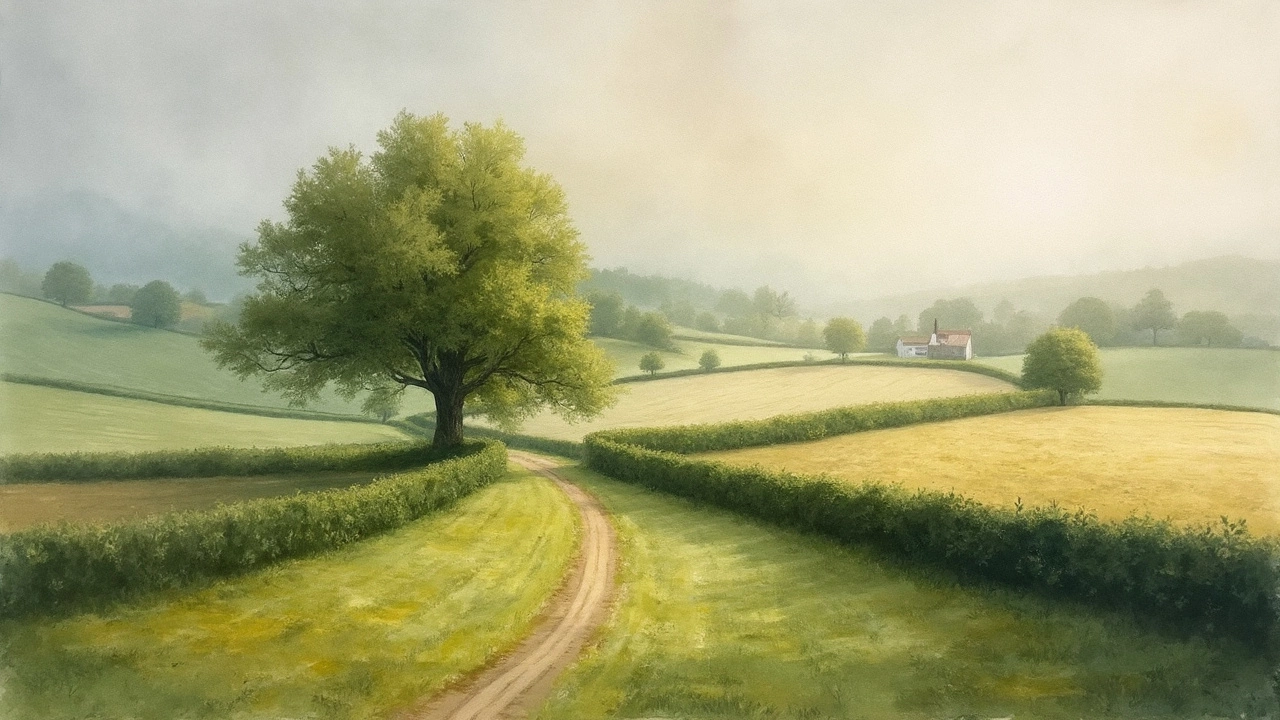
Instead of jamming a mountain, tree, or sun smack in the center, slide it over to one of these intersections. Suddenly, your landscape feels way more alive. The eye travels, explores, pauses, and moves again. It’s like you’re sending a silent roadmap to your viewer’s brain—and they happily follow along. Famous artists, from Ansel Adams to Claude Monet, often broke up their skies and land along the horizontal lines. Adams even joked that he never met a horizon he wanted to put smack in the middle of a composition.
Looking for a cheat? Instead of measuring every time, many painters just tape or lightly mark their canvas thirds before starting. Even phone cameras now let you activate a rule-of-thirds grid for reference. But here's where it gets fun: not every painting needs to stick to these lines 100% of the time, but the rule gives you a starting point—a safety net that beginners find super helpful.
Think about a windswept New Zealand beach. Place the horizon along the lower third instead of splitting the space down the middle. Suddenly, the sky dominates and creates a sense of openness. Or, toss a silhouette of a lonely tree at the left third. Now, your viewer’s eye slides from the empty sand right to that tree, lingering for a moment before sweeping out to sea. You haven’t added anything new, but it feels richer and draws more emotion. Cool, right?
To see how this plays out in reality, check out the table below. It compares different positions for the horizon in painting, showing how the feel of the artwork shifts.
| Horizon Position | Emotional Effect | Famous Example |
|---|---|---|
| Center | Stable, calm, can feel static | Traditional portraits |
| Upper third | Ground/land emphasized, invites the viewer ‘in’ | “Wanderer Above the Sea of Fog” by Caspar David Friedrich |
| Lower third | Emphasizes sky, mood, openness | Cloudscapes by John Constable |
| On a third intersection (right/left) | Dynamic, energetic, leads the eye | Many works by Vincent van Gogh |
With so many famous artists following this rule—even if just as a guideline—you’re in good company. If you’ve ever felt like your paintings lack ‘oomph,’ try shifting your subjects to those magic intersections instead of anchoring them squarely in the center. It can completely flip the mood of your work.
Why the Rule of Thirds Works for Human Eyes
Ever noticed how you scan a scene in a painting, a photo, or even nature itself? Your eye rarely goes straight to dead center. It bounces around the main elements, exploring, lingering in places that feel balanced and interesting. The rule of thirds takes advantage of this natural human tendency, giving your viewers cues about where to look first—and what to feel along the way.
There’s some neat science behind this. Back in 2006, a study published in the journal Perception tracked people’s eye movements while viewing both traditional and non-traditional art. Results showed that viewers spent almost twice as long studying works that used “off-center” compositions, like those guided by the rule of thirds. Reason? Our brains crave patterns, but not monotony. The rule of thirds finds this perfect middle ground: enough order to feel comforting, but enough tension and movement to keep things interesting.
Go for a walk in Wellington’s Botanic Garden and you’ll see the same dance playing out—your eye roams from the brightly colored tulips, toward winding garden paths, and up to the canopy lines at the edges of your vision. That’s visual balance in action, straight from nature. The rule of thirds ‘borrows’ this kind of natural harmony and drops it onto your canvas.
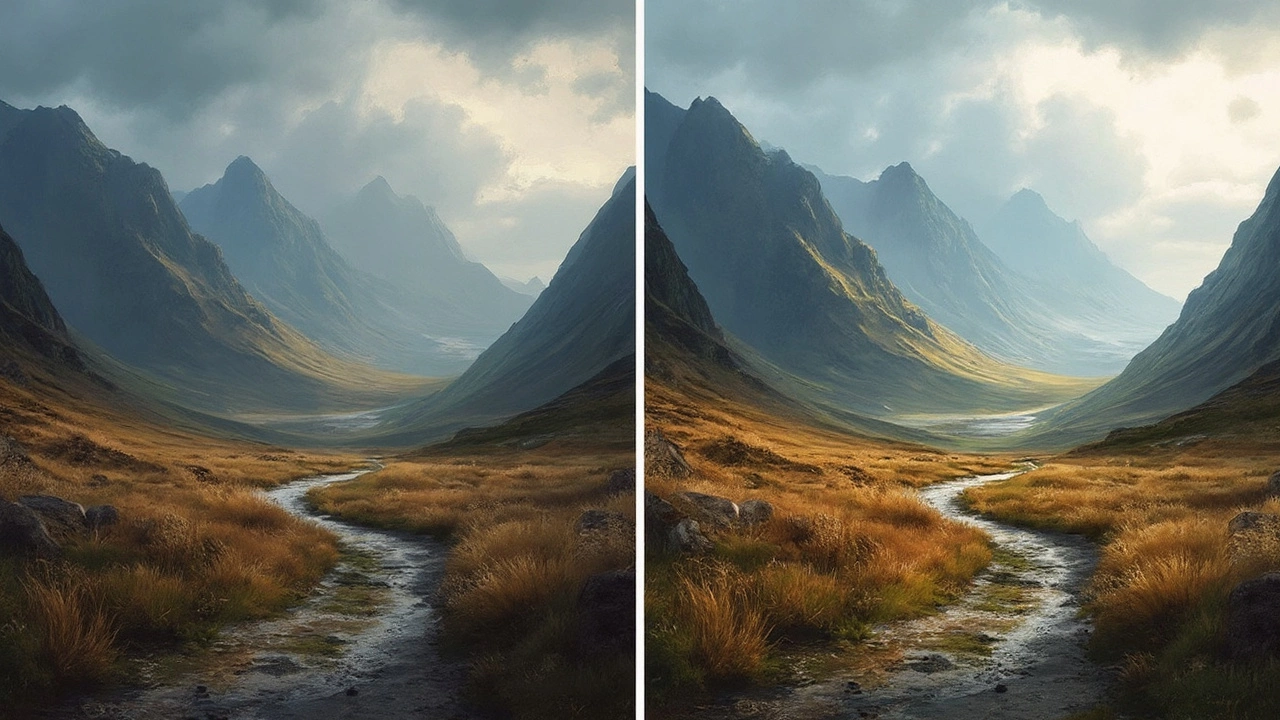
But here’s where it gets surprising: seasoned artists sometimes break the rule of thirds. Once you’ve learned it (and used it), you’ll start to recognize its power—and where breaking it adds drama. For example, a stormy seascape with the horizon dead center might feel perfectly still, almost haunting. Or, a path plunging right down the middle of a composition can create a sense of stubborn directness or confrontation.
Still, when beginners skip the rule and place everything in the center, the result often looks awkward or accidental. The rule of thirds gives your paintings a leg-up, helping even new artists create landscapes that look intentional and well-thought out.
Many artists use a few favorite tricks to stick with the rule or adjust on the fly:
- Sketch in the grid lightly on the canvas using a pencil before you begin painting. It erases easily.
- Use the alignment tool or grid overlay on your phone camera when snapping your reference image.
- Place focal points, like a cottage, lighthouse, or group of sheep, right where the lines cross—it anchors your composition with minimal guesswork.
- If you’re painting a sweeping sky, place the horizon along the bottom third line. For a moody, earth-powered landscape, use the top third.
- Let lines—like rivers, fences, or tree trunks—run along the vertical thirds for instant depth and perspective.
One trick that always works? Step back from your painting and squint. Does your eye jump directly to the center and get stuck, or does it move naturally around the canvas, taking in the different elements? If it’s the latter, you’re nailing balance—rule of thirds style.
Making the Rule of Thirds Work for Your Style
Here’s the thing: the rule of thirds isn’t a straightjacket. It’s more like a compass, nudging you toward compositions that feel harmonious but still have energy. Some artists swear by it, others play fast and loose with the rule. Both paths lead to awesome art, as long as you know what feeling you want from the start.
Look at Kiwi painter Bob Kerr. He’s known for his open New Zealand skies and quiet landscapes, often placing the horizon low, making the sky take up two-thirds of the painting. That alone gives his work a sense of vastness you don’t get when the space is split evenly. Across the ocean, Australian watercolorist Joseph Zbukvic uses the rule of thirds for urban scenes—placement of key shapes at the grid intersections gives his cityscapes a gentle flow, even with all that bustling traffic.
Want another tip? When deciding what deserves a ‘thirds’ spot, ask yourself what part of your scene really matters. It could be a strong tree, a streak of evening sunlight, or even a flock of gulls scattered along the beach. Push those elements onto or near a power point. Don’t stress about mathematical precision; close is good enough for great results.
Maybe you prefer painting from photos. In that case, try cropping your image on your phone or tablet, using the rule-of-thirds grid found in most editing apps. Drag the key part into a power point, and watch the mood change instantly. Suddenly, lakes look more expansive, hills roll with purpose, and forests have more mystery.
Let’s talk about breaking the rule. Artists do it all the time, but they do it on purpose. If you want a painting to feel rigid, orderly, or unsettling—go ahead, center everything. But if you want a landscape that people love to look at, the rule of thirds is your best friend. Veteran artist Peter Siddell used this rule to highlight the stillness and isolation of Auckland’s urban spaces, loading visual weight onto one third of the canvas and letting emptiness sing in the rest.
Here’s a list of quick dos and don’ts from my sketchbook:
- Do move your focal point near one of the four crossing points for instant energy.
- Do line up key horizontal elements, like rivers or shorelines, along horizontal thirds.
- Don’t stress over pixel-perfect placement—the eye wants a suggestion of balance, not gridlock.
- Do use the rule of thirds to crop reference photos, especially if your first shot looked dull or ‘off.’
- Don’t feel forced to obey every time—a rule broken knowingly is better than following out of habit.
Here’s the secret: using the rule of thirds doesn’t turn your art into a formula. It unlocks choices and lets you control how people feel as they view your work. You become the boss of the mood, instead of leaving it up to chance.
The next time you’re wandering along Wellington’s windswept beaches or cozy harbors, notice where your eye lands naturally. You’ll probably find the rule of thirds at play in the most breathtaking scenes—no rulers, no fuss, just honest, balanced beauty waiting to be put on canvas.