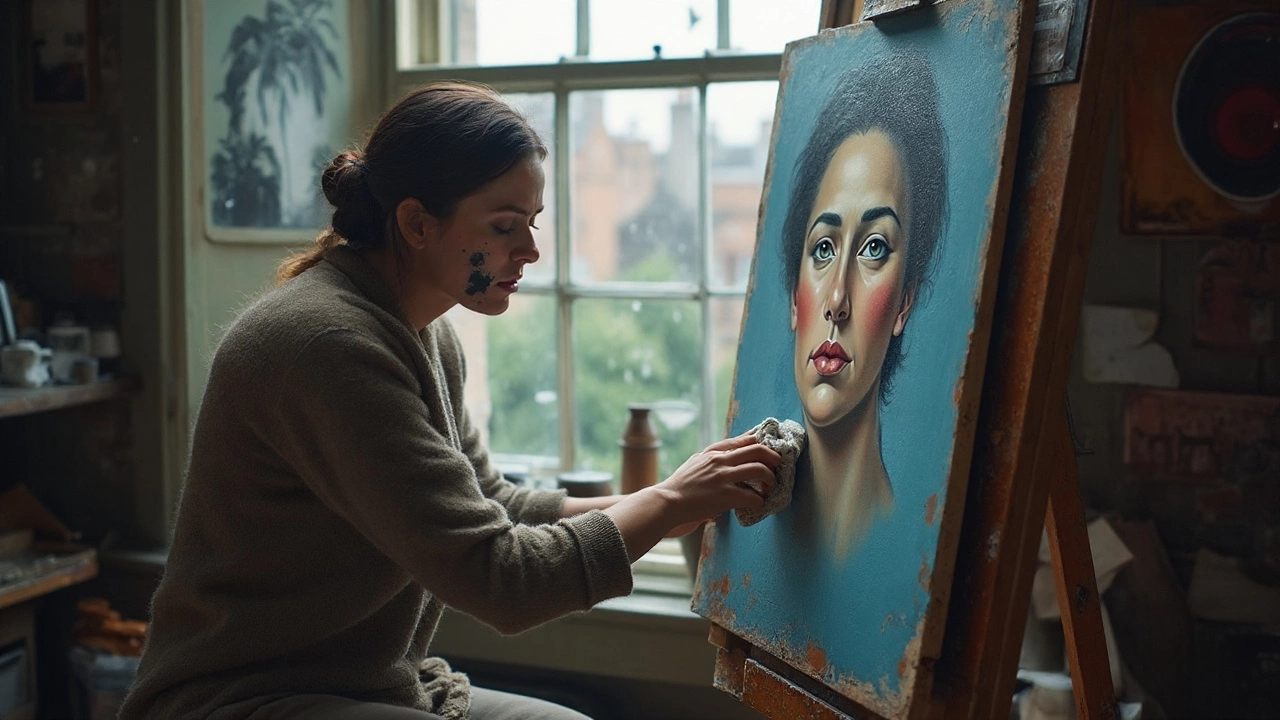
Oil paint is kinder than it looks. Most slips-wonky eyes, muddy skies, a color that screams-can be corrected without wrecking the surface. The trick is choosing the right move for the paint’s stage: wet, tacky, or bone-dry. You won’t always “erase” a mark back to brand-new canvas, but you can lift, redirect, or bury it cleanly so no one ever knows.
Here’s a realistic promise: you’ll learn when to lift, when to scrape, when to glaze, and when to stop and let it set. You’ll also avoid the two big killers of oil paintings-solvent damage and cracked layers-by following the same rules conservators use in the studio.
TL;DR: if the paint is wet, act fast and gently. If it’s tacky, scrape and repaint lean. If it’s dry, glaze or scumble and follow fat-over-lean. When in doubt, wait, oil out, and repaint.
- Fix wet mistakes by lifting with a clean brush or lint-free cloth; blot, don’t rub.
- On tacky paint, scrape flat, oil out lightly, and repaint with a lean mix.
- On dry paint, use glazes (to darken/shift hue) and scumbles (to lighten/soften) to correct color and value.
- Follow “fat over lean” to prevent future cracking; avoid over-thinning with solvent.
- For varnish decisions, use a retouch varnish for testing; wait 6-12 months for a final varnish per paint-maker guidance.
Fast fixes while the paint is wet
When the mark is fresh, you have the highest chance of a clean correction. Time window varies by your medium. Straight linseed slows drying; alkyd speeds it; a drop of clove oil keeps paint open longer. On typical studio conditions, your “wipe-out” window is roughly 15-60 minutes.
Tools I keep at hand: soft lint-free rags, cotton swabs, a clean flat synthetic brush, odorless mineral spirits (OMS) like Gamsol, a palette knife, a kneaded eraser for dry chalk marks, and a maulstick for steady hands.
- Stop the spread. Freeze. Don’t smear the mistake wider. Park the brush. Turn the canvas if needed so gravity works for you, not against you.
- Lift, don’t rub. For a wet stroke you hate, touch a clean, dry brush to the spot and “kiss” the paint off. Wipe the brush each pass. If needed, lightly dampen the brush or a cotton swab with OMS and lift again. Blot; don’t scrub. Scrubbing drives pigment into the ground and scuffs the surface.
- Wipe-out to ground. For larger areas, wrap a lint-free rag over your finger, barely damp with OMS, and sweep once in one direction. Replace the rag patch every pass. You can erase back to a toned imprimatura without scarring if you’re gentle.
- Edge surgery. To straighten a horizon or correct a contour, use a clean flat brush dipped in a touch of OMS. Pull a crisp edge, then repaint the missing slice in the right color. A mahlstick helps keep your hand steady.
- Dust or hair removal. Slide the tip of your palette knife under the intruder and lift it off like a splinter. Don’t dig. If it leaves a crater, tap in a tiny bit of matching paint.
- Sgraffito for misdrawn lines. If a line is too thick, scratch the excess away with a wooden skewer or the knife’s dull edge, then repaint the clean line.
- Reset the surface (optional). If you’ve disturbed a zone and it looks patchy, lay a whisper-thin “couch” of medium (a drop of linseed or solvent-free gel spread thin) and repaint into that slick surface. Paint glides, edges blend, mistakes drop.
Heuristics that save paintings:
- Use solvent as a cleaner, not a thinner. Excess solvent weakens paint films; this is flagged in ASTM D4302 specifications for artists’ oil paints and echoed by major manufacturers.
- Lift from light passages first to avoid dragging dark pigments into clean lights.
- If your brush leaves “ghosts,” it’s already dirty. Swap for a clean one.
- If you feel friction when wiping, stop. You’re close to abrading the ground.
Safety note: set solvent-soaked rags flat to dry or submerge them in a closed metal can with water. Oily rags can self-heat. Paint makers and fire safety agencies warn about this for a reason.
Corrections on semi‑dry and dry paint
Once the paint is no longer workable, you’ll switch from lifting to resurfacing. Your choice depends on how set the layer is.
Quick test: press a clean knuckle to the paint. If it strings, it’s wet. If it grips slightly or feels tacky, it’s semi-dry (touch-dry). If it’s hard and cool with no transfer, it’s dry to the touch. “Dry to the touch” isn’t cured. Curing can take months.
On semi-dry (tacky) paint:
- Skim the high spots. Hold a palette knife almost flat (about 10-15°) and shave only the bump you want gone. Think icing a cake, not plowing a field.
- Feather the edge. Use 600-800 grit wet/dry paper very lightly, only if needed on a panel, not stretched canvas. Wipe dust away with a barely damp OMS cloth. Sanding is optional and risky; on canvas it can burnish or fuzz the weave.
- Oil out. Wipe a thin film of 1 part linseed oil to 2-3 parts OMS. Rub in, then wipe off until only a satin sheen remains. This “reactivates” the color read and helps new strokes sit cleanly.
- Repaint lean. Use paint straight from the tube or with a small touch of OMS/alkyd-not a juicy, oily mix. Lean under fat is your insurance against future wrinkling and cracks. Tate Conservation and many manufacturer handbooks summarize this fat-over-lean rule clearly.
On fully dry paint:
- Glaze to darken or shift hue. Mix a transparent color with a lean medium (for example, a small amount of linseed or an alkyd medium) to a tea-like consistency. Brush a thin, even film to adjust value and color. Multiple thin glazes are safer than one thick one.
- Scumble to lighten or soften. Use an opaque or semi-opaque light mix (titanium white with a touch of color), spread thin and dry-brushed over texture to veil without filling every pore.
- Block and replace. For a shape that’s simply wrong-an eye too high, a roof too steep-paint the correct under-shape slightly larger, let it set, then restate edges more crisply.
- Selective removal (tiny areas). You can sometimes coax a small dry mark off with OMS on a swab, but test in a margin. Strong solvents like acetone can swell grounds and are not studio-friendly. Museum labs (e.g., Smithsonian MCI) stress minimal, tested solvent use.
- Unify dead patches. Sunken areas read falsely dark. Rub a minimal oil-out or a mist of retouch varnish to test color matching. Retouch varnish is temporary; it lets you judge color, then you can paint over it.
When you’re changing layers, remember longevity:
- Fat over lean. Each new layer should have equal or slightly more oil than the last. This reduces internal stress and cracking. This principle shows up across conservation guidance (Tate, CCI) because it’s proven.
- Skip zinc white for structural layers. Zinc oxide can embrittle over time; ASTM notes concerns, and conservation research (e.g., M. Mecklenburg at the Smithsonian) has documented cracking in zinc-heavy films. Prefer titanium or mixes formulated without high zinc content for main painting layers.
- Modern medium choices. If you use damar varnish inside paint, it can yellow and complicate future cleaning. Many paint makers now suggest simple oil + OMS or alkyd mediums for corrections.
Varnish timing: Most manufacturers advise waiting 6-12 months for a final varnish, depending on thickness and environment. Until then, use a thin retouch varnish if you need to even gloss or test color while you continue painting.

Color, value, and edge repairs that actually work
Not all mistakes are “marks.” Lots are decisions-too light, too saturated, edges shouting when they should whisper. Here are reliable ways to change the read without grinding the surface.
Value too dark? Don’t smother it with thick white. Mix an opaque light in the right hue family (titanium white plus the local color), then scumble it thinly to lift value but keep texture. If you need a larger jump, repaint the passage more opaquely in two passes instead of one chalky one.
Value too light? A transparent glaze is your friend. Ulramarine + transparent oxide brown makes a quick adjustable neutral. Keep the glaze thin; you should be tinting the surface, not adding a sticky layer.
Chroma too loud? Knock it down with a micro-glaze of the complement or a neutral gray you mix yourself (avoid store-bought grays that lean blue unless that’s what you want). Try a test swatch on scrap first. A single, super-thin pass often does it.
Temperature off? Warm a cool area with a transparent warm (transparent earth orange, alizarin crimson permanent) or cool a warm area with a transparent cool (phthalo blue/green, ultramarine). Temperature tweaks can fix realism faster than value tweaks in skin and skies.
Edges out of control? For too-hard edges on wet paint, touch a clean, dry soft brush (mop or badger) and barely tickle the edge to melt it. For edges that are too soft, wait until tacky or dry, then restate with a sharper, slightly lean stroke. Remember: lost-and-found edges make forms turn.
Faces and features. If an eye drifted north, don’t chase it wet. Let it set. On dry paint, draw the correction with a thin, neutral paint line (not charcoal; dust can contaminate oil). Measure with plumb lines and horizontal checks. Block in the correct socket and lids, then add the iris last. The first crisp edges should be in the corners-not around the whole iris-so it stays alive.
Mud recovery plan. Mud happens when you overmix complements or keep pushing into a semi-dry surface. The cure is time. Walk away. Let it dry (with an alkyd, often overnight; with straight oil, 24-72 hours). Oil out, then repaint with fewer strokes: two to state, one to blend, stop. If you need subtlety, layer with controlled, transparent glazes instead of wet stirring.
Compositional fixes. When a big shape placement is wrong, treat it like a mini-redesign. Tone the area slightly with a lean neutral. Restate the drawing with a thin paint line. Block in the new masses. Keep edges soft until late so you can adjust. Hard edges lock you in too early.
Medium recipes that behave. For corrections, keep it simple: a drop or two of linseed in the paint, or a touch of an alkyd medium if you need speed. If you oil out, wipe off excess so the surface is satin, not wet. Thick oil on the surface can cause wrinkling as the top skins faster than the bottom.
White paint choices. Titanium white is your main workhorse. Keep it lean, and avoid piling thick, oily titanium on early layers. If you love the handling of mixing whites, choose formulations designed for flexibility and avoid high zinc content in major passages.
Checklists, FAQs, and troubleshooting
Bookmark these. They save hours in the studio.
Quick triage: what stage is my paint?
- Wet: paint moves freely; colors smear. Fix: lift/blot, wipe-out, correct edges now.
- Tacky: paint grips a little; edges hold. Fix: scrape high spots, oil out, repaint lean.
- Dry to touch: hard surface, no transfer. Fix: glaze/scumble, block-and-replace, light sanding on panels only if needed.
Minimal correction toolkit
- Soft, clean rags (lint-free), cotton swabs
- Two clean flats (one for lifting, one for painting), a soft mop
- OMS (odorless mineral spirits) for cleaning/lifting
- Linseed oil or solvent-free gel for oiling out
- Palette knife, wooden skewer, mahlstick
- Optional: alkyd medium for faster drying, retouch varnish for unifying sunk-in areas
Before you scrape
- Check if the layer underneath is fully set. If the underlayer moves, wait longer.
- Use the knife flat; do not gouge. Stop if you feel weave.”
- Keep shavings out of wet areas; they stain.
After you repaint
- Let it set undisturbed. Closing doors, fans, pets, and sleeves cause more fixes than bad drawing does.
- Evaluate color under consistent light. Mixed temps can fool your eye and push you into wrong adjustments.
Safety and longevity
- Use solvent in small amounts with good ventilation. Skin contact adds up; gloves help.
- Dispose of oily rags safely: lay flat to dry or store wet in a sealed metal can. Spontaneous combustion is real.
- Label mediums and keep lids tight. Unknown mixes cause surprises months later.
Mini‑FAQ
- Can I literally erase oil paint? If it’s fresh, you can lift back to the ground with OMS and a lint-free rag. Once dry, think in layers: glaze, scumble, or repaint.
- How soon can I paint over a fix? Immediately if the surface is still workable and clean, or after an oil-out on tacky/dry zones. If you scraped to the ground and it’s absorbent, let any oil-out sit a few minutes and wipe off thoroughly before repainting.
- Can I sand an oil painting? Very lightly on rigid supports (panels) and only to knock down ridges. Avoid sanding stretched canvas; it damages fibers and the ground.
- I got a hair stuck in a dry area. Now what? Lift it with a knife tip. If it’s embedded, shave the bump, oil out, and inpaint the speck with a tiny brush.
- My paint wrinkled. That’s usually too much oil or thick over thin. Let it hard-dry (sometimes weeks), slice the ridges flat, oil out, and repaint leaner.
- Can varnish hide mistakes? Final varnish can unify gloss and slightly deepen color, but it won’t fix drawing or heavy texture. Use retouch varnish only as a temporary aid while you continue painting; wait 6-12 months for final varnish per maker guidance (Gamblin, W&N).
- What sources back these practices? ASTM D4302 outlines specs for artist oils; Tate Conservation and the Canadian Conservation Institute summarize fat-over-lean best practices; the Smithsonian has published on zinc oxide brittleness and paint film behavior.
Troubleshooting by scenario
- Smudged sky gradient (wet): Blot with a clean, dry brush, reestablish the light band, then blend once with a soft mop. Stop.
- Crooked horizon (wet or tacky): Mask with a straight edge or use a mahlstick. Clean the line with a damp flat, then repaint the edge in one confident pass.
- Muddy skin tones (semi‑dry): Let it set. Oil out. Rebuild with two clear passes: warm halftones first, cools second, no more than one blend touch per area.
- Wrong background color (dry): Glaze a neutral to shift hue and value. If that’s not enough, scumble an opaque near the target color and glaze on top to fine-tune.
- Overworked detail (eyelashes, foliage): Scrape the spaghetti. Repaint larger shapes first, then add a few decisive accents with a slightly thicker mix.
- Streaky matte patches: They’re sunken-in areas. Oil out thinly or use a light retouch varnish mist; match colors after that, not before.
Decision guide
- Is it wet? Lift/blot → repaint.
- Is it tacky? Scrape high spots → oil out → repaint lean.
- Is it dry? Glaze to darken/shift → scumble to lighten/soften → block and replace if shape is wrong.
- Is the surface uneven? Oil out lightly to judge color → paint → let set → reassess.
If you remember nothing else, remember this: choose the fix that asks the least from the surface. A tiny lift, a single crisp restatement, or one smart glaze usually beats brute force. That’s how you fix oil painting mistakes without leaving fingerprints behind.
